How to Integrate ChatGPT to Your Own Discord Bot
February 24, 2023
ChatGPT is a powerful language model developed by OpenAI. This article will teach you how to integrate it with a Discord bot to help teams work more efficiently and foster communication and collaboration. We will show you how to do the integration without writing a single line of code. If you want to have customization, it is very easy to customize the integration by changing a few simple configuration settings
Introduction
First, we open source the code for the integration. Check it out at:ChatGPT-Discord-Bot. To use a ChatGPT bot in Discord. You only need to type /chat in the input box, and a keyword /chat message will be automatically inserted. You can directly enter text to interact with ChatGPT. In addition, we also integrated the DALL·E 2 model, so you can use /imagine prompt to generate images through text, as shown below:
Integration Steps
Get Token
OpenAI Token
Register/login to your account on the OpenAI platform. You will need to provide basic information for your first-time registration
Click the profile icon in the upper right corner and select
View API keys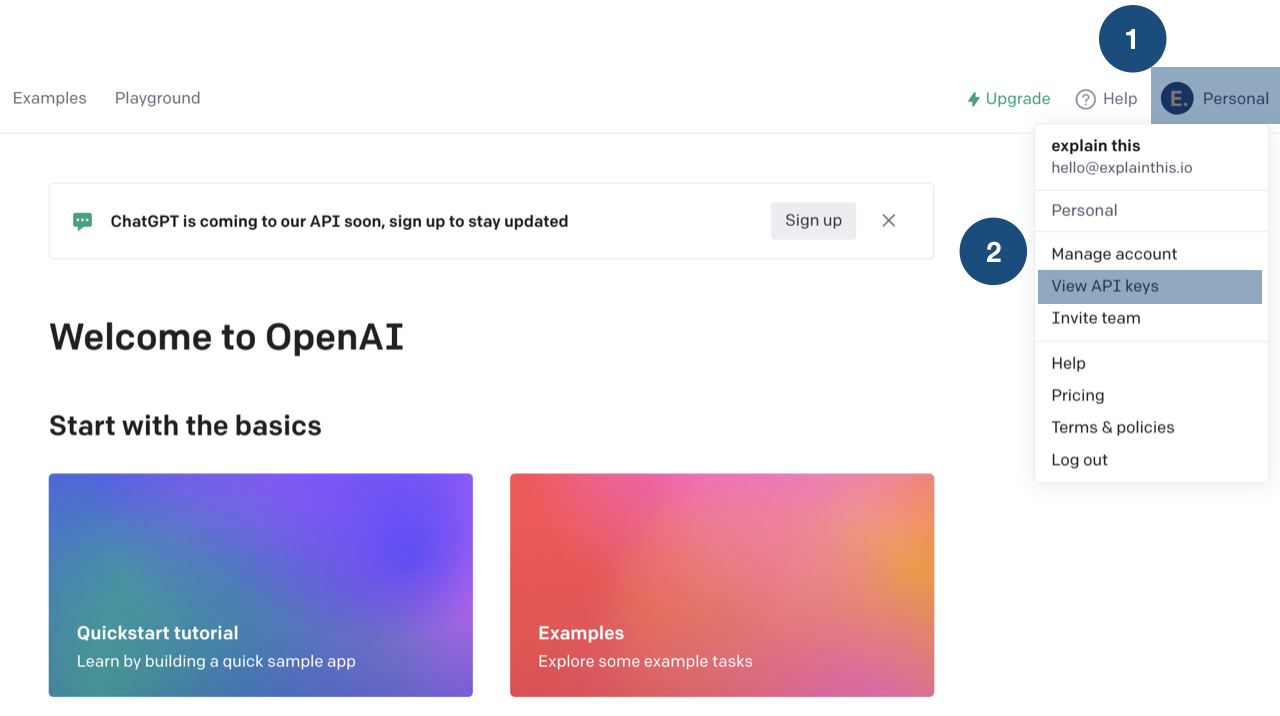
Get OpenAI Token Step1 and Step2 Click
Create new secret keyin the middle.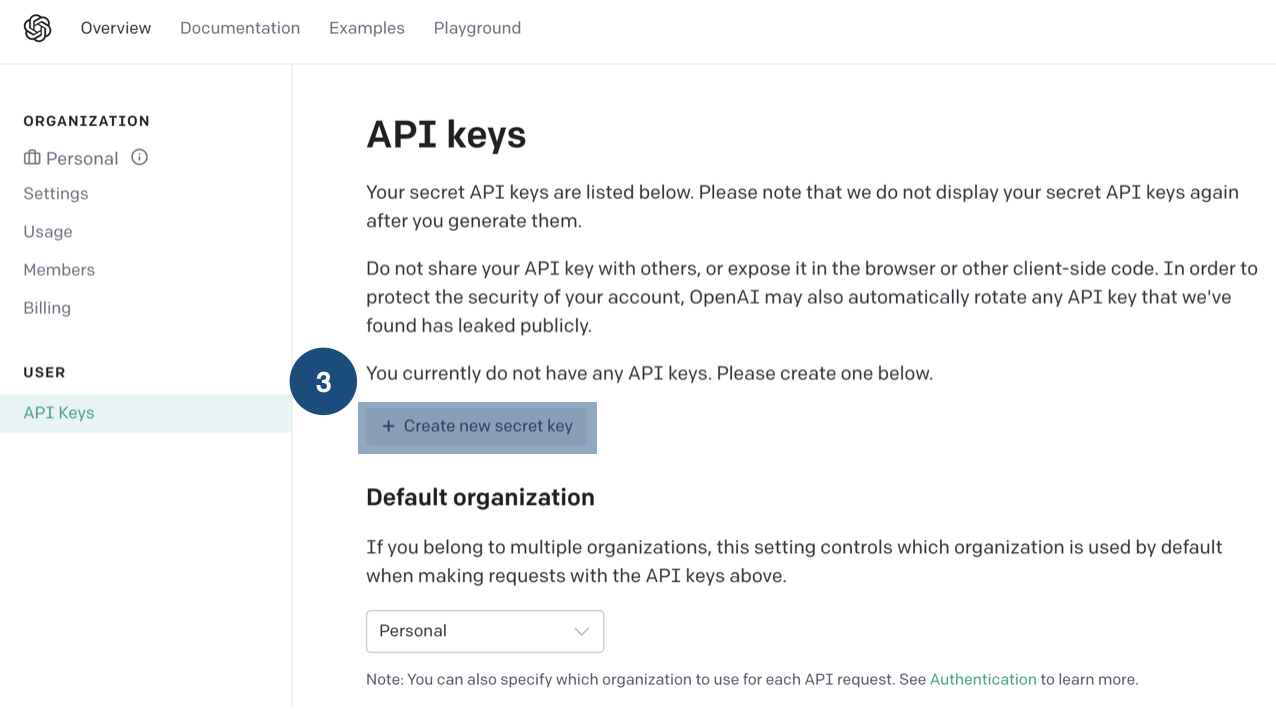
Get OpenAI Token Step3 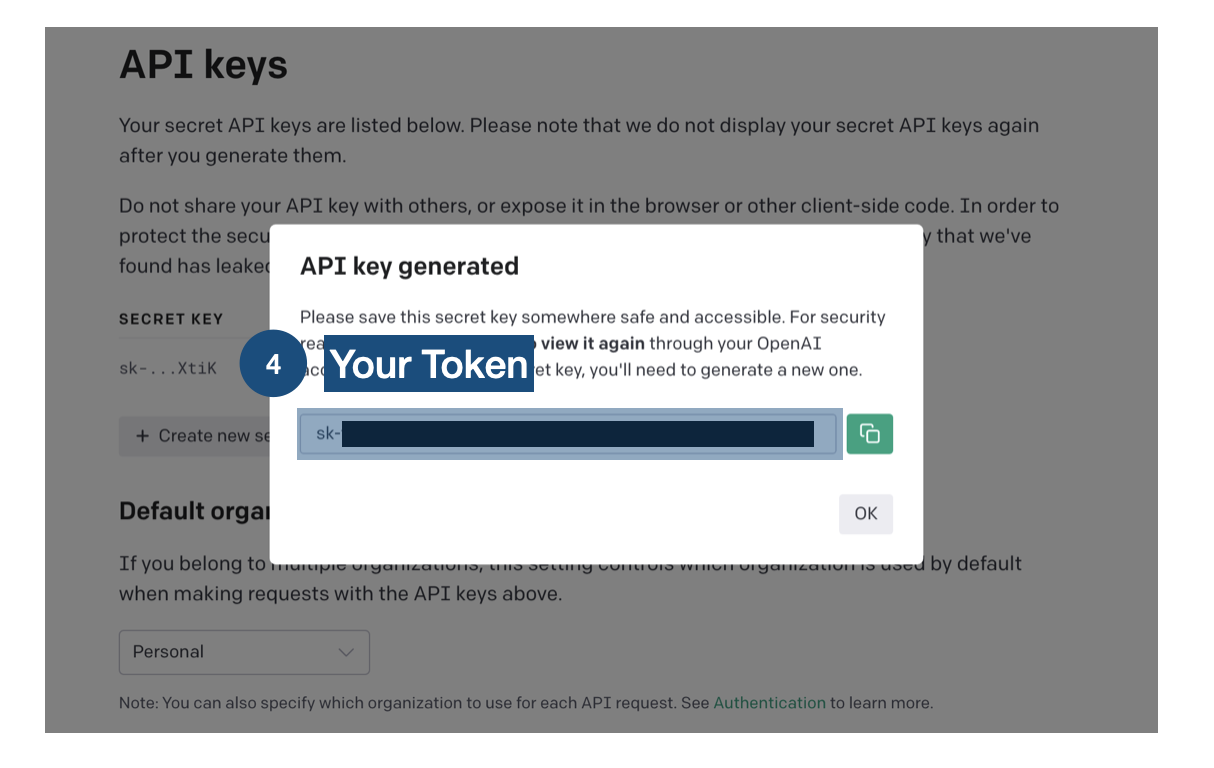
Get OpenAI Token Step4
⚠️ Each API has a free quota and its limitations. For details, please refer to OpenAI Pricing
Discord Token
Log in to Discord Developer
Create a bot:
Enter
Applicationson the left sideClick
New Applicationin the upper right corner and enter the bot's name. After it is confirmed, enter a new page.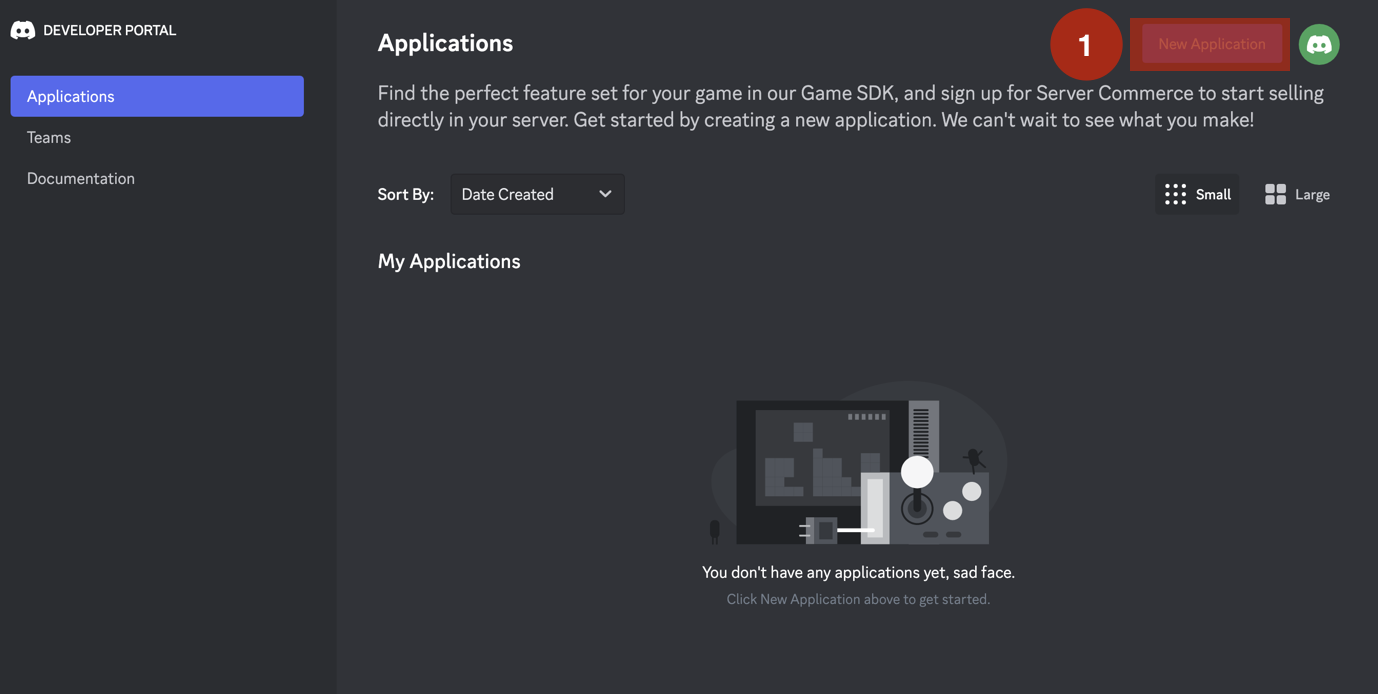
Get Discord Token Step 1 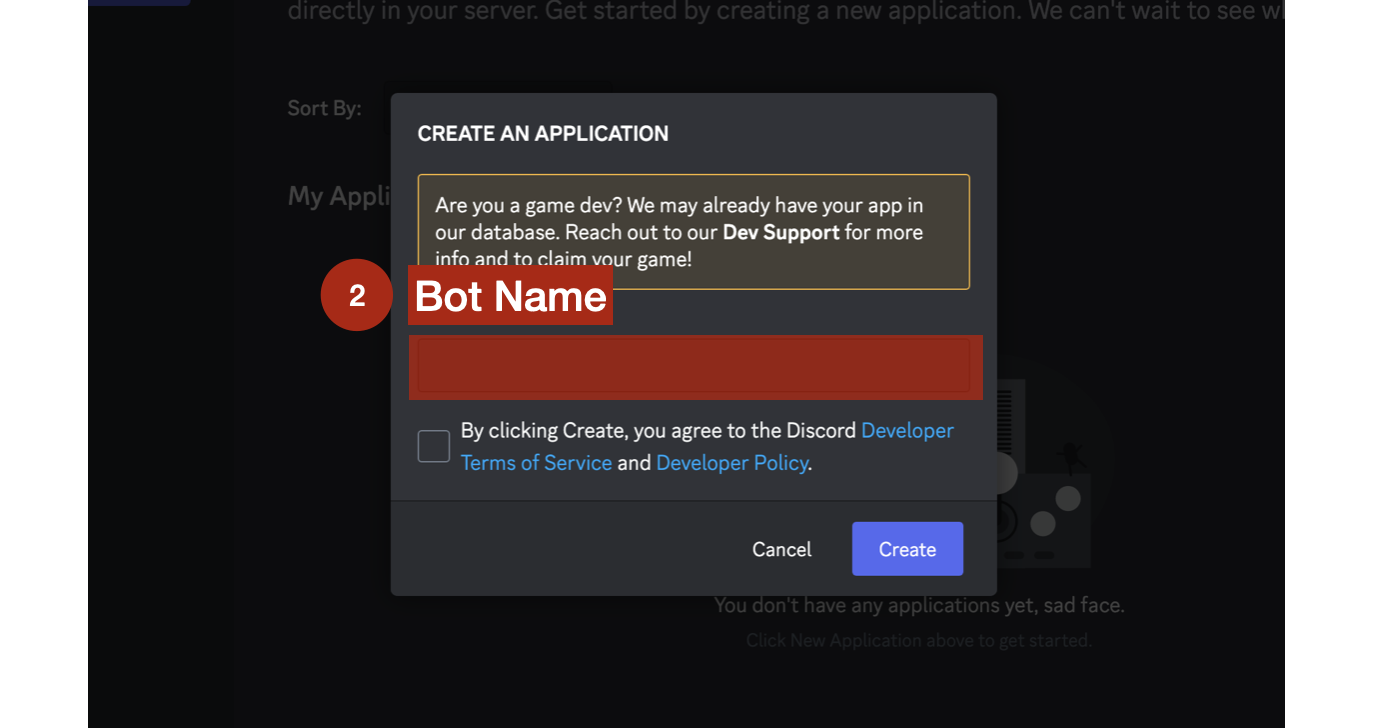
Get OpenAI Token Step 2 Click
Boton the left side.Click
Add Boton the right side.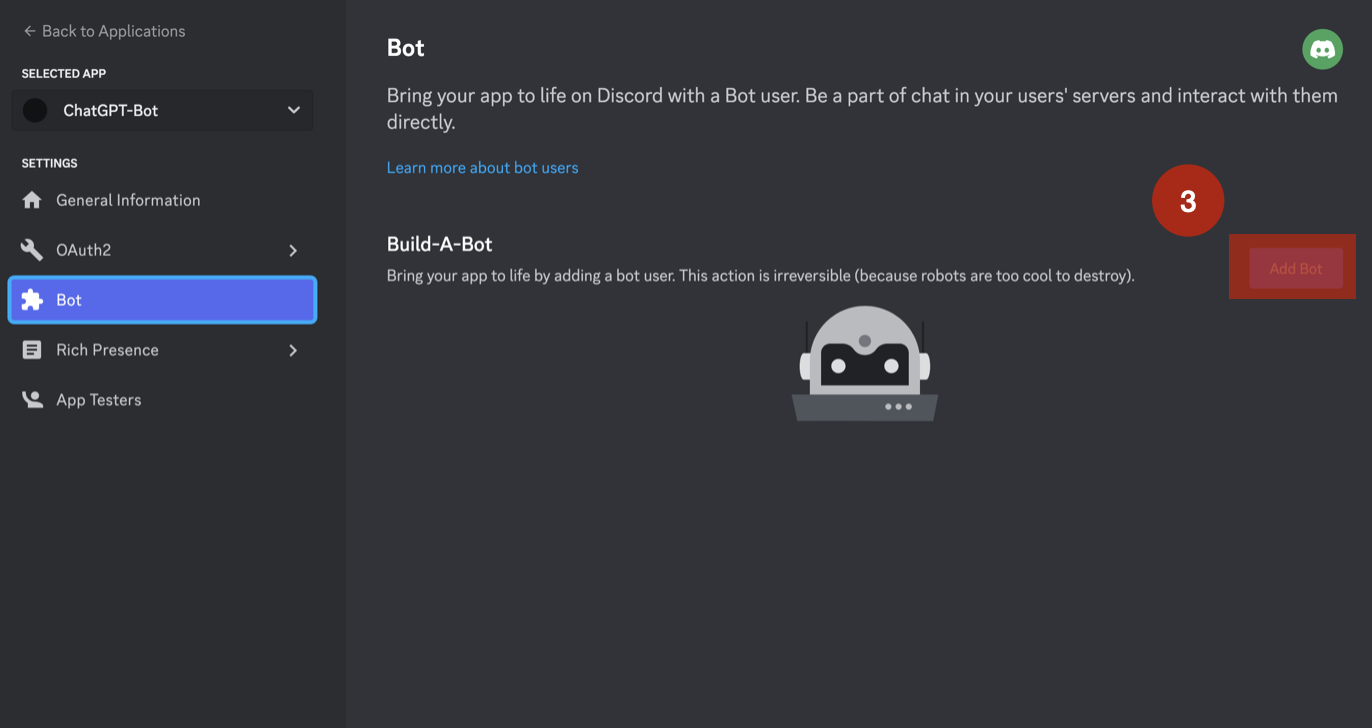
Get OpenAI Token Step 3 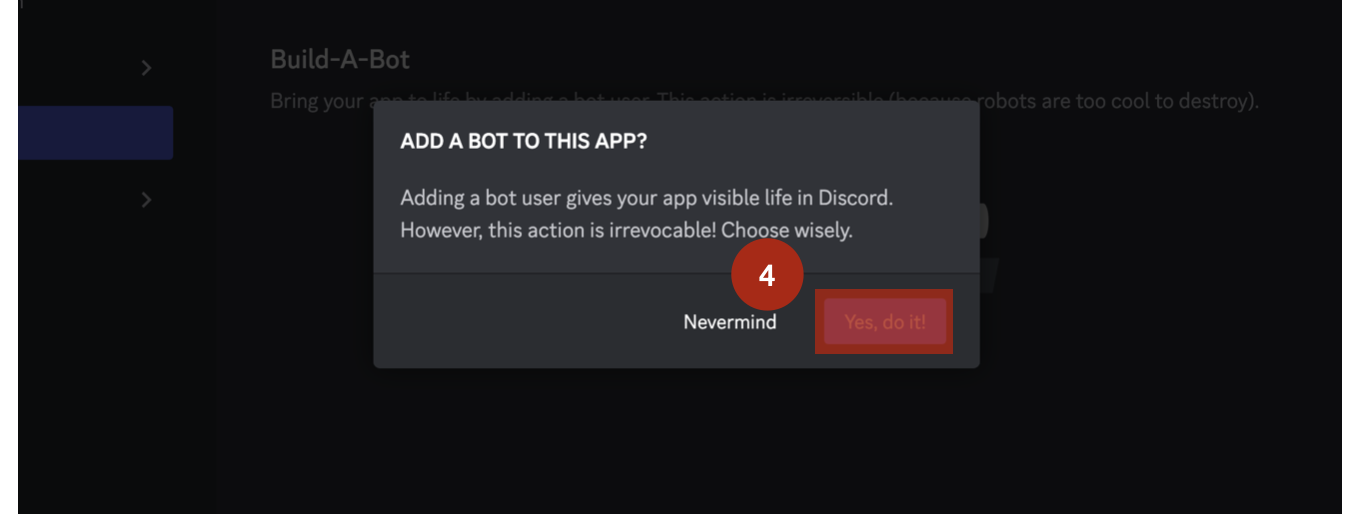
Get OpenAI Token Step 4 Click
View Token. If you have already applied a token before, clickReset Token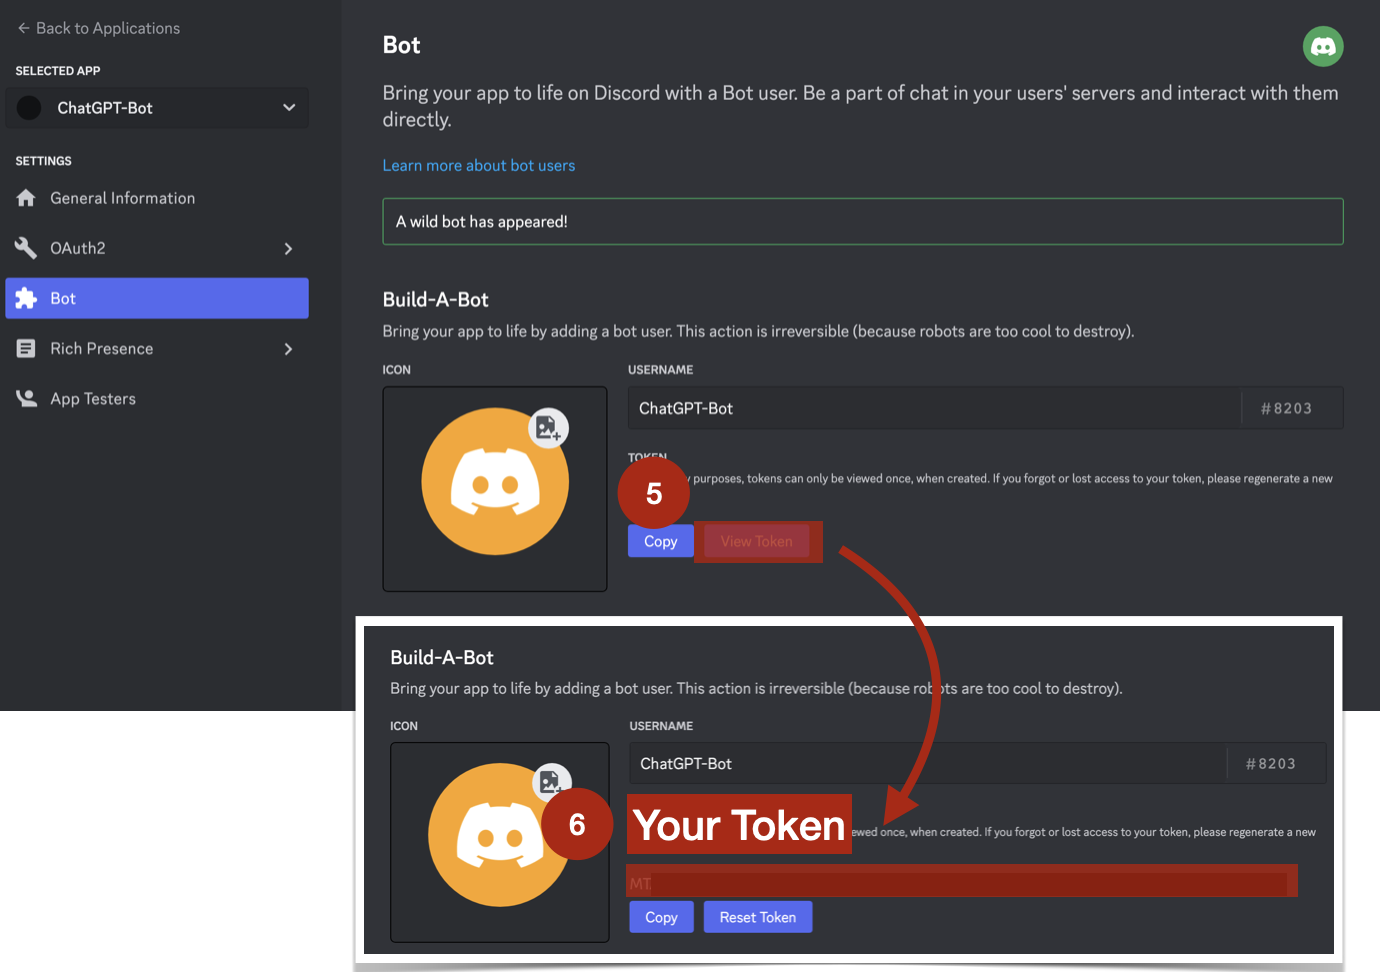
Get OpenAI Token Step 5 and Step 6 Turn on
MESSAGE CONTENT INTENTClick
Save Change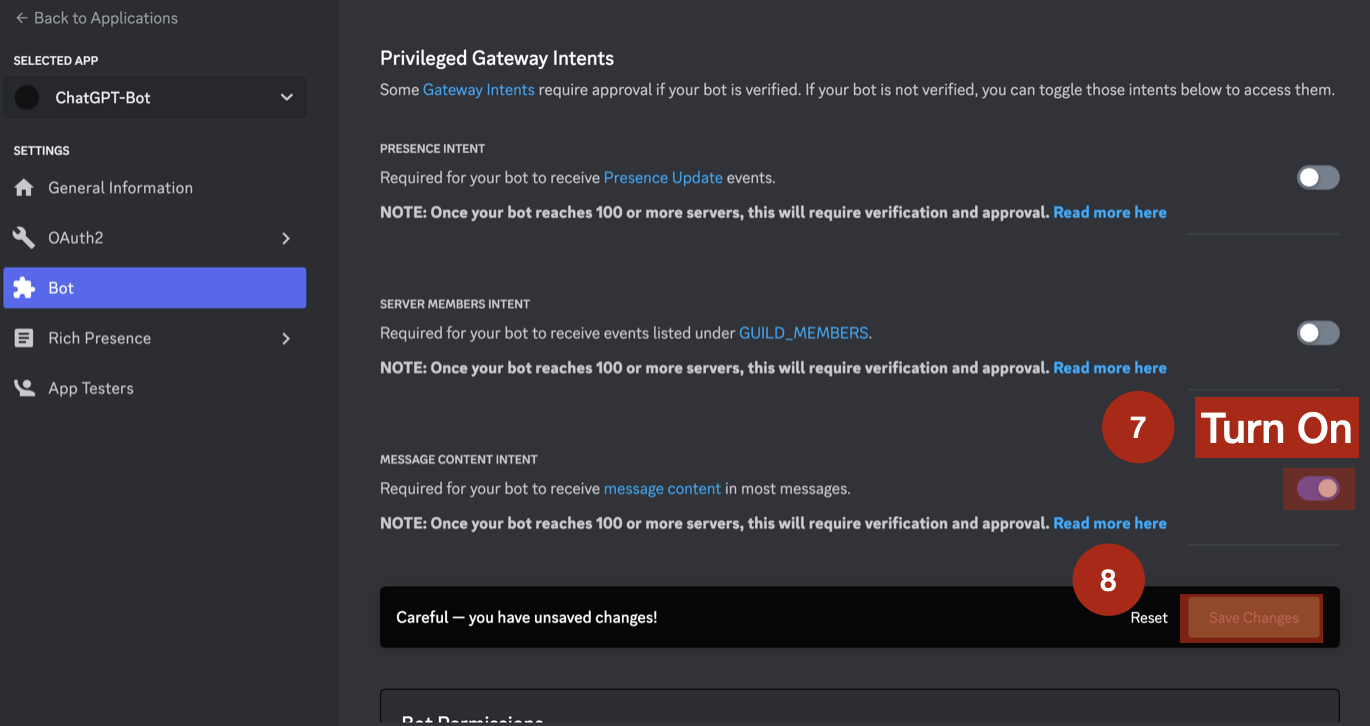
Get OpenAI Token Step 7 and Step 8
Set up OAuth 2
- Click
OAuth2on the left - Click
URL Generatoron the left - Choose
botunderSCOPESon the right, and chooseAdministratorunderBOT PERMISSIONSat the bottom right {' '}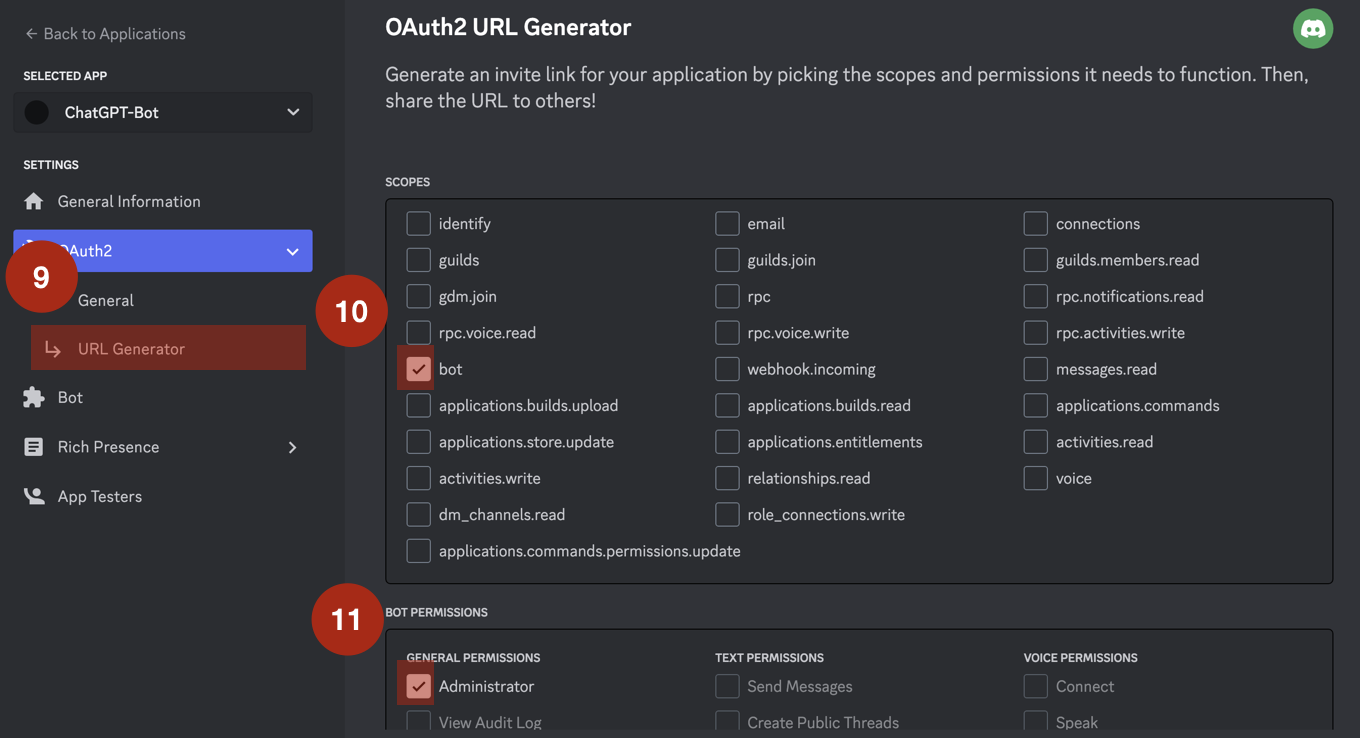
Get OpenAI Token Step 9, Step 10 and Step 11 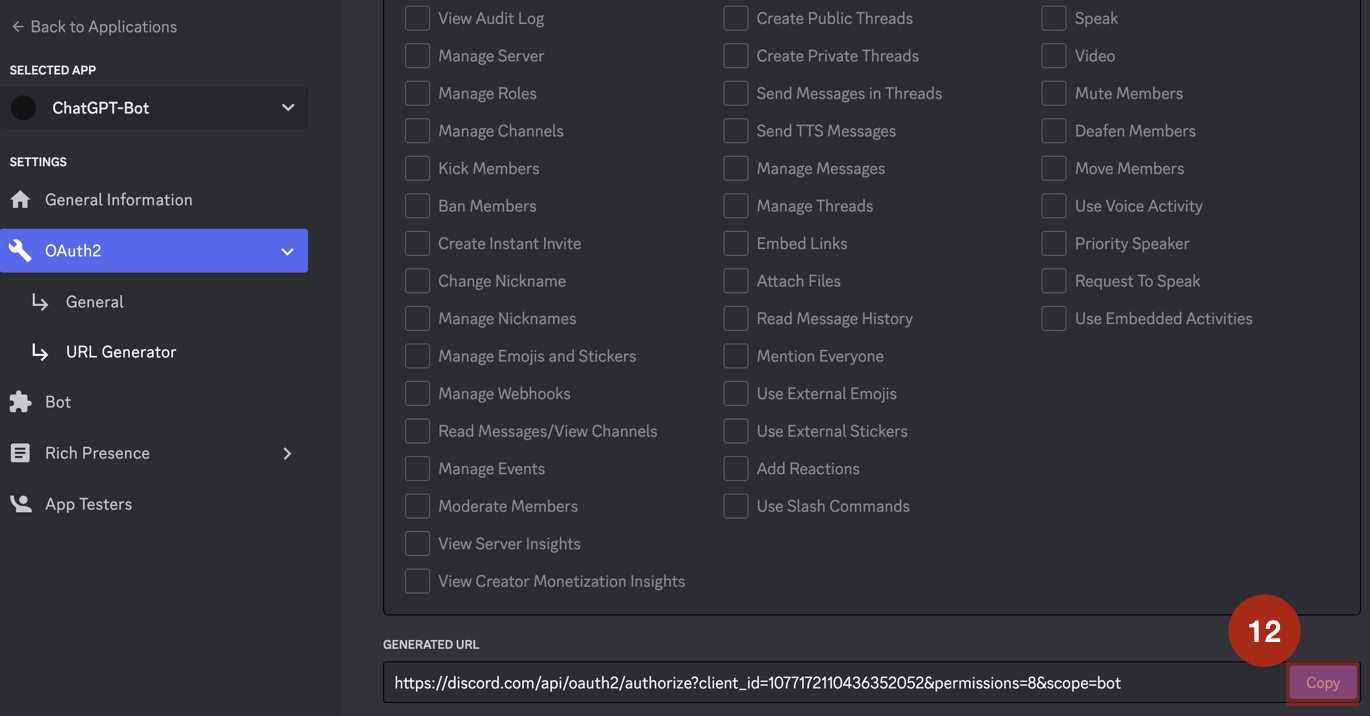
Get OpenAI Token Step 12 - Copy the URL at the bottom to your browser
- Select the server you want to join

Get OpenAI Token Step 13 and Step 14) - Click
Continueand thenAuthorize
- Click
Project Setup
Fork the Github project
Register/login on GitHub
Enter ChatGPT-Discord-Bot
Click
Starto support this repositoryClick
Forkto copy all the code to your own repository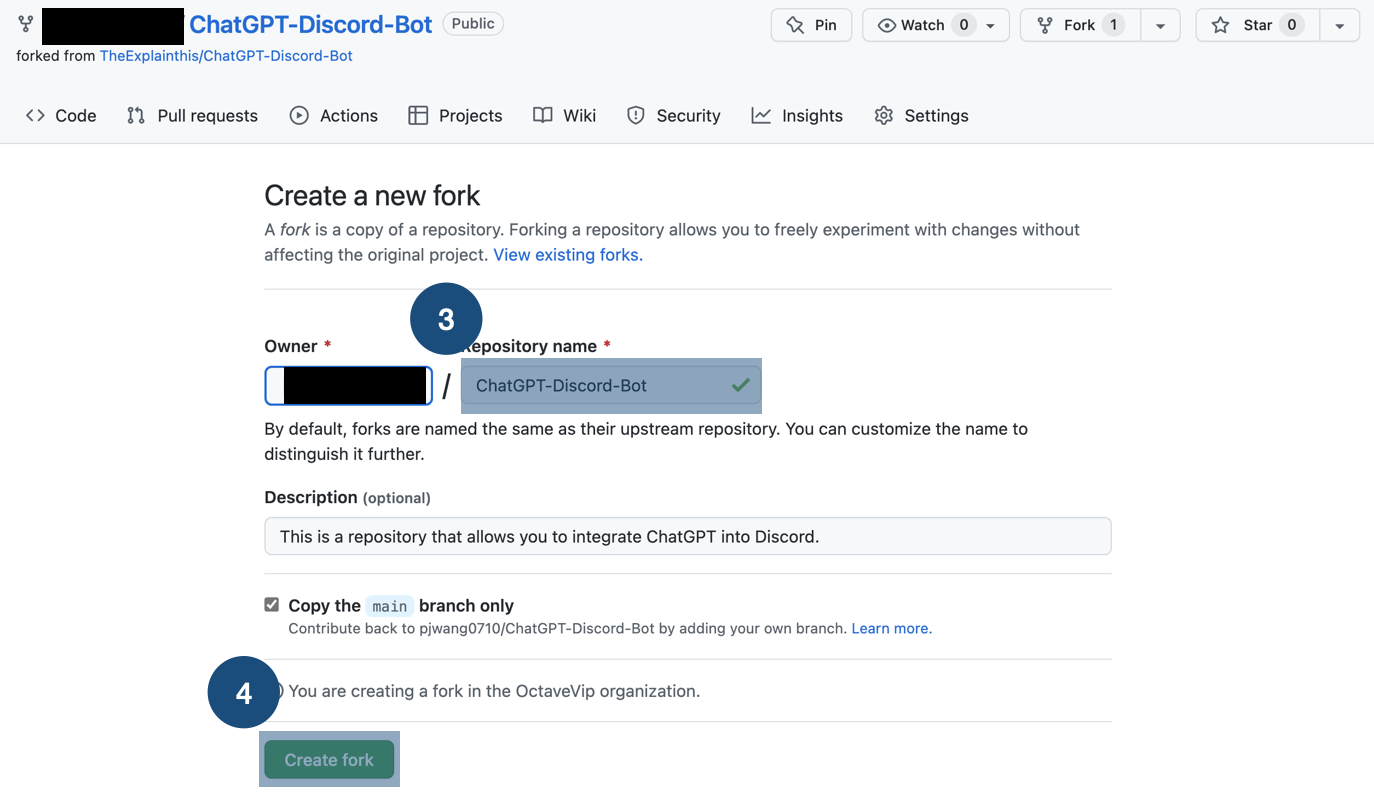
Fork Github Repository Step 1 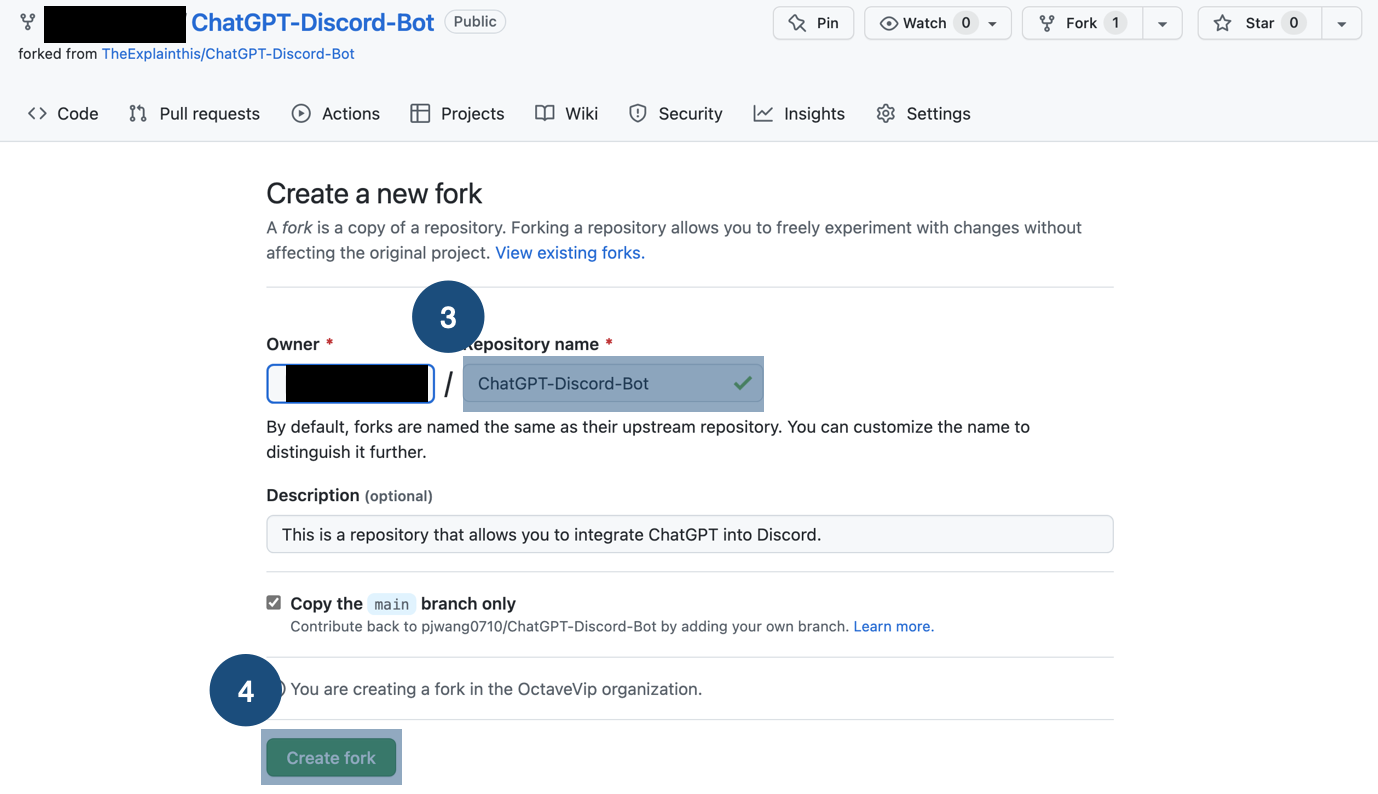
Fork Github Repository Step 2
Deployment for Free
Go to replit
Click
Sign Upand use yourGithubaccount to sign up, and then clickSkipto skip the initializationAfter you enter, click
Create. A pop-up will show up. ClickImport from Githubon the top right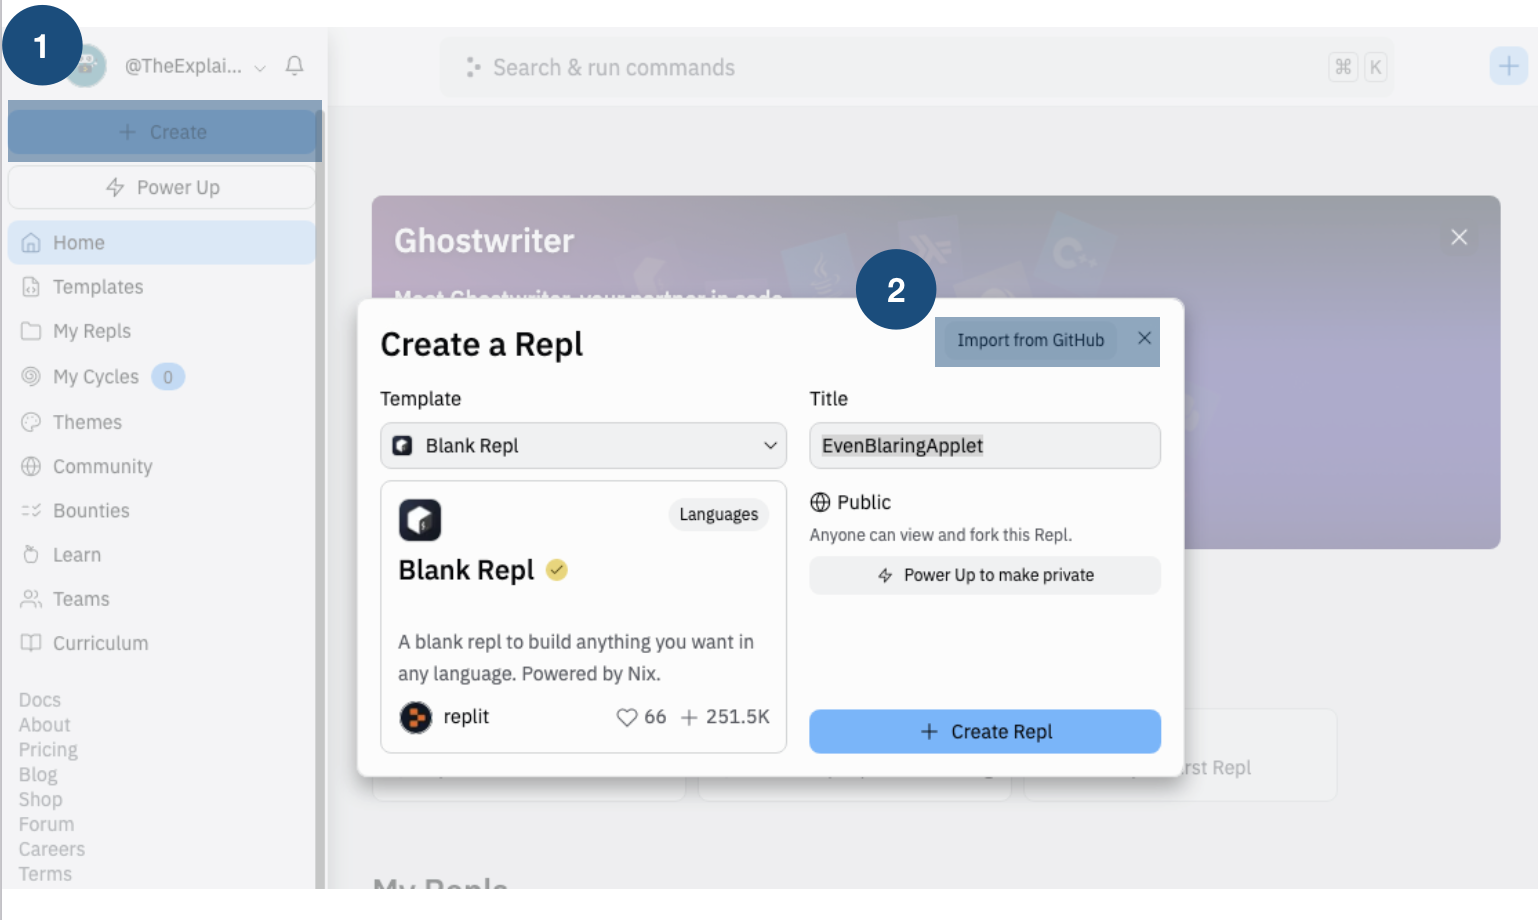
Replit Deploy Step 1 If you have not yet added your GitHub repository, click
Connect GitHub to import your private repos., and then selectOnly select repositoriesandChatGPT-Discord-Bot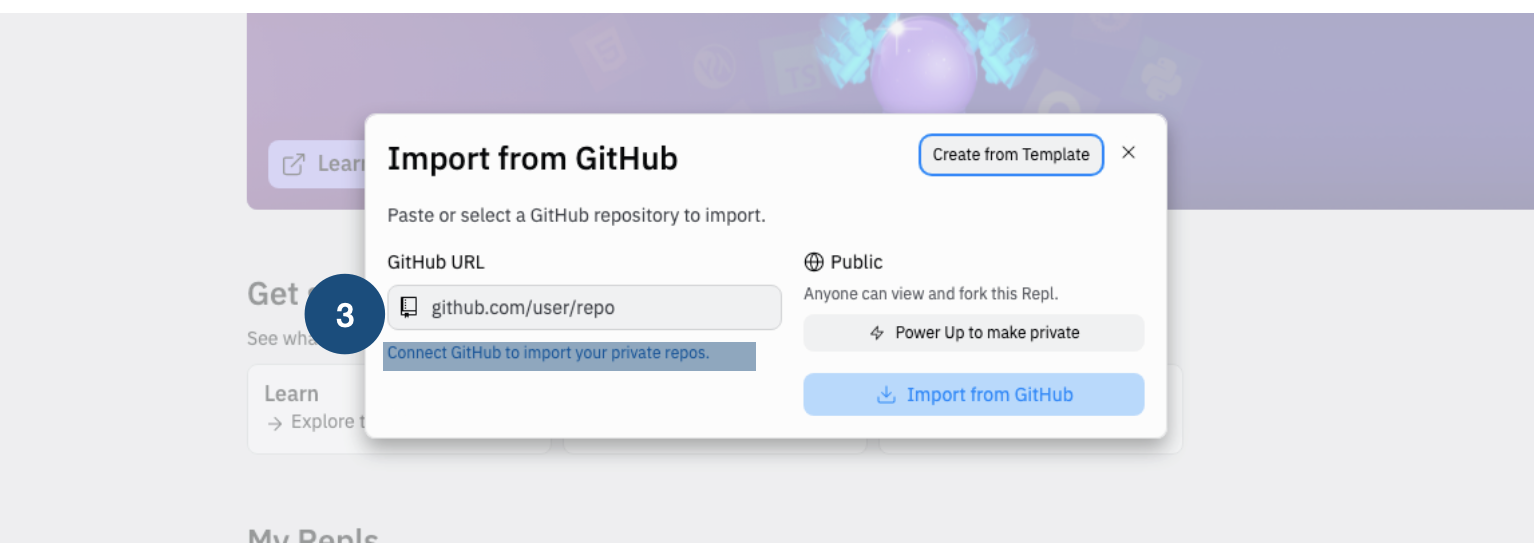
Replit Deploy Step 2 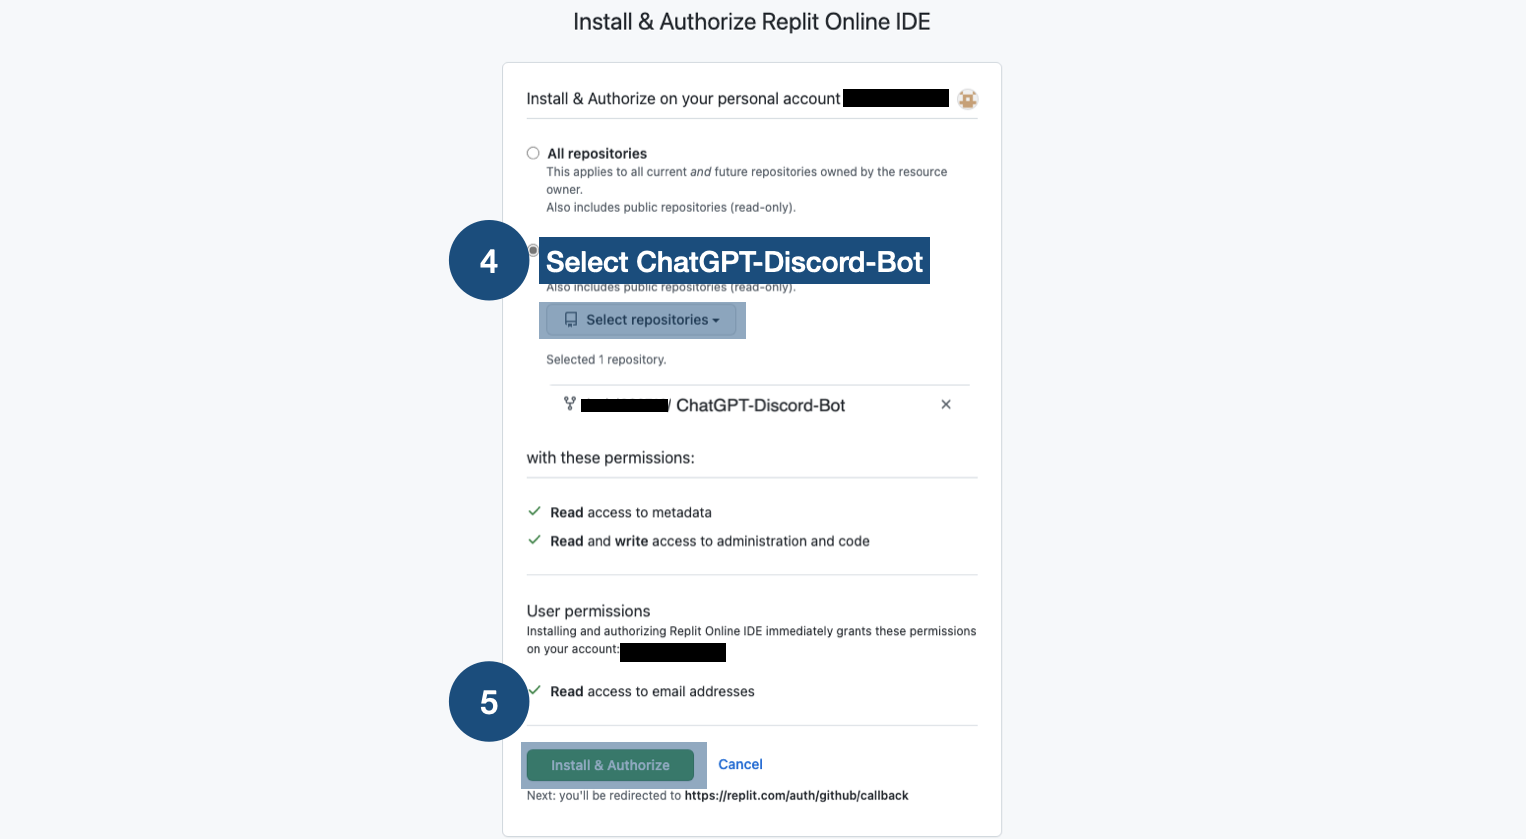
Replit Deploy Step 3 Go back to step 4, now in
Github URL, you can selectChatGPT-Discord-Botproject. Now clickImport from Github。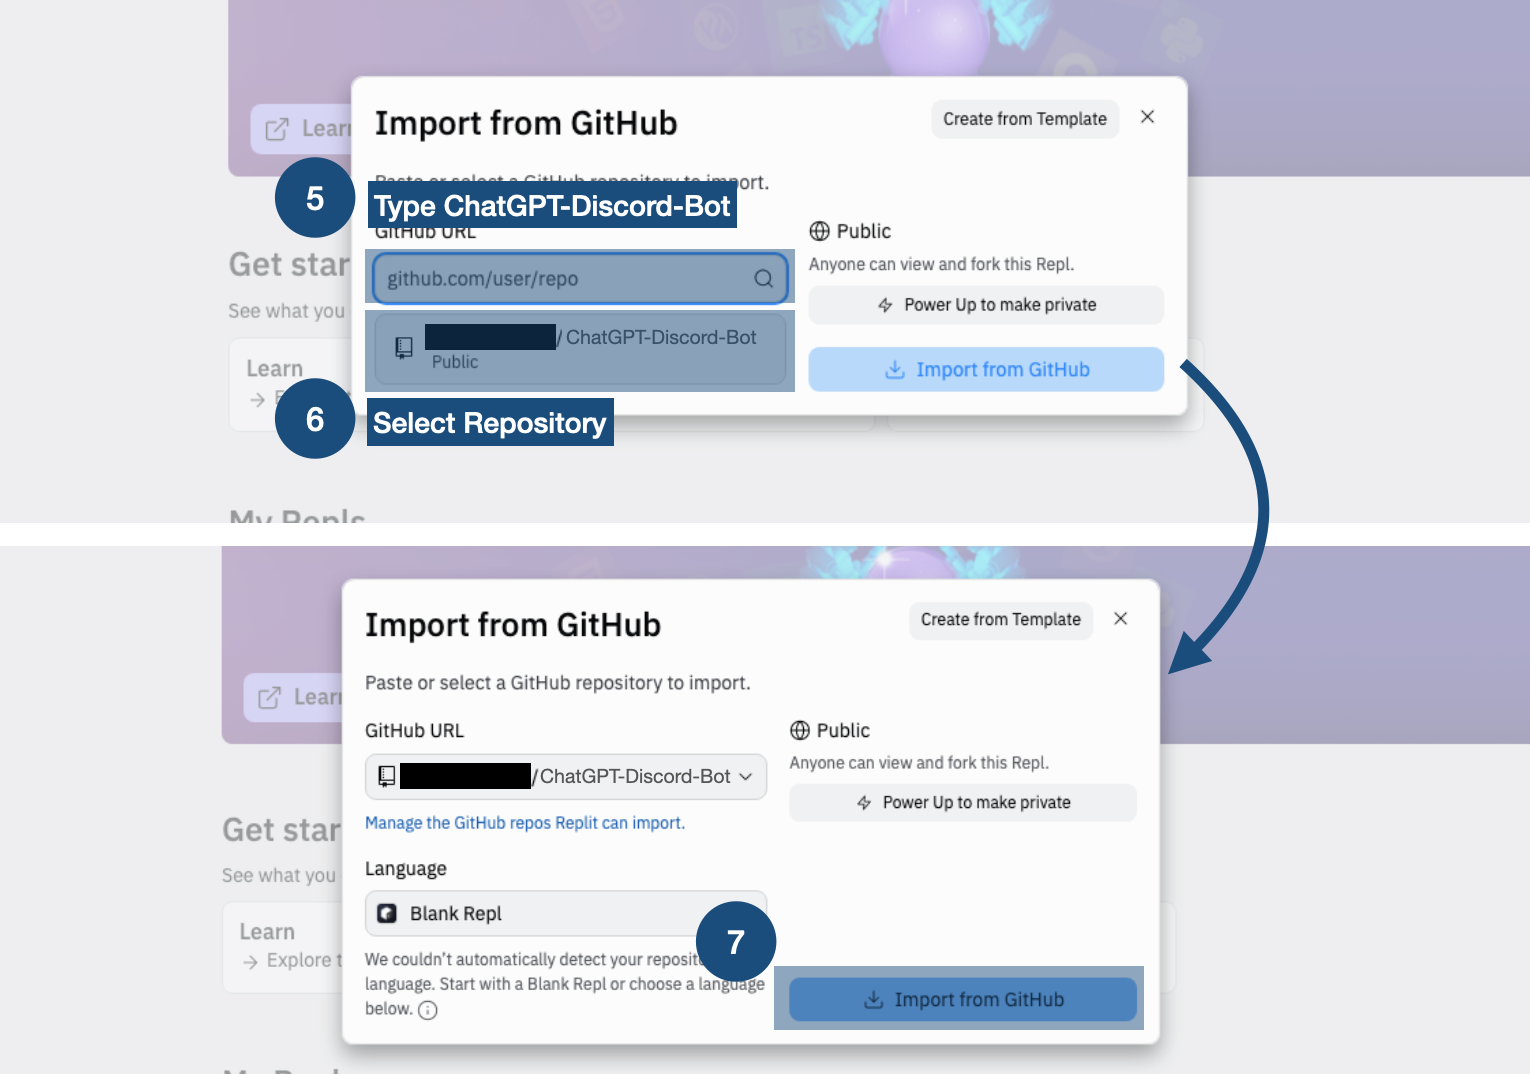
Replit Deploy Step 4
Start the Project
Environment variables setting
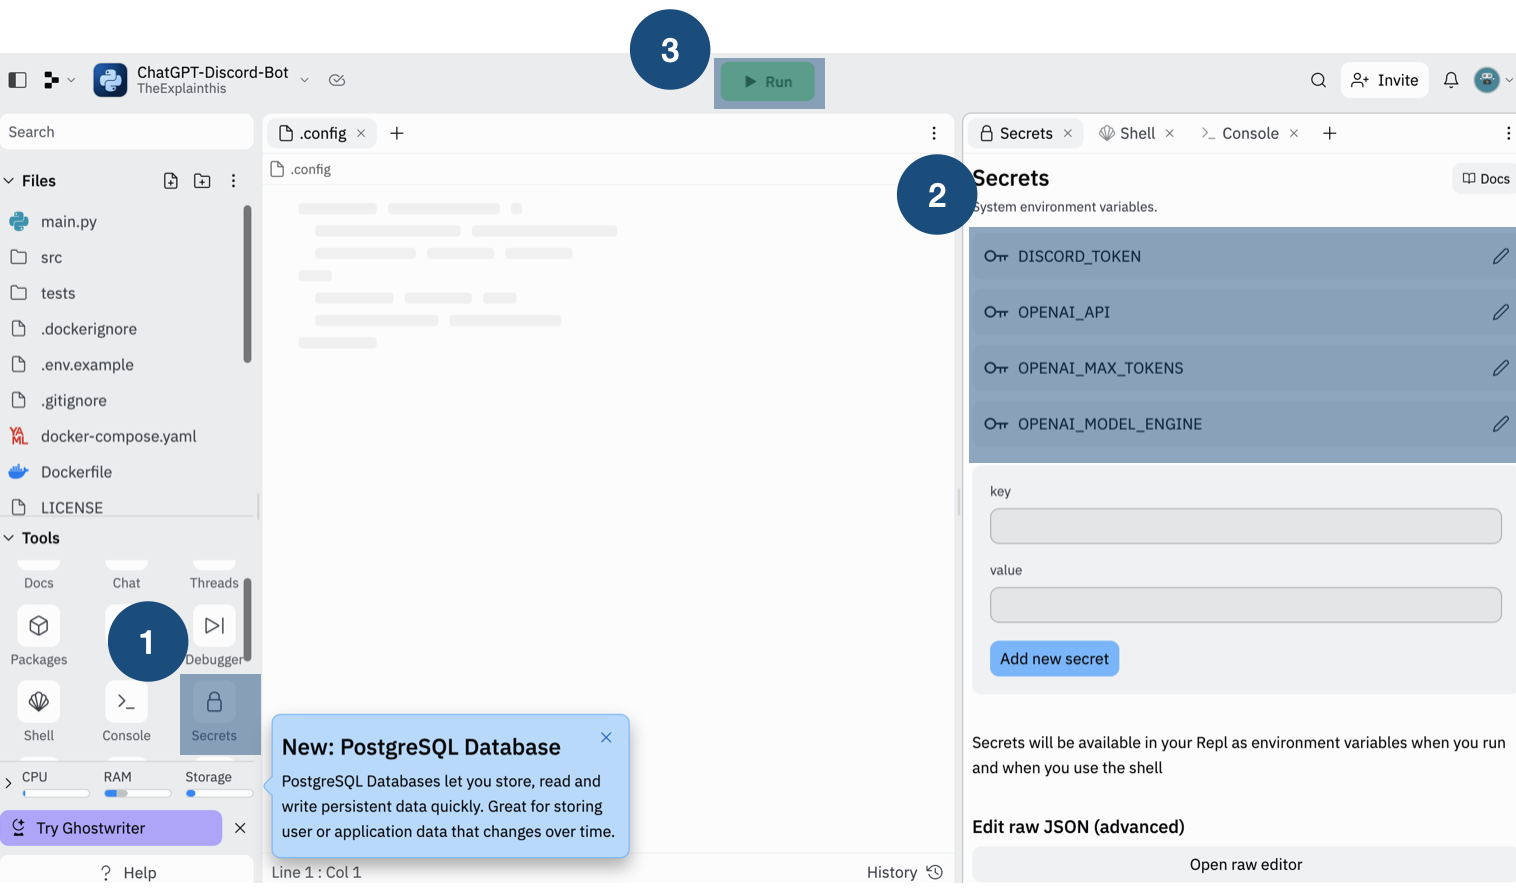
After you
Import, go to theReplitproject management page. SelectToolsand then clickSecrets。Click
Got itin the bottom right, and add the environment variable- OpenAI API Token:
- key:
OPENAI_API - value:
sk-FoXXXX (this is from the step above)
- key:
- Select the model:
- key:
OPENAI_MODEL_ENGINE - value:
gpt-3.5-turbo
- key:
- ChatGPT The role words that the assistant wants to play (currently the official has not released more usage methods, and the players are tested by themselves)
- key:
SYSTEM_MESSAGE - value:
You are a helpful assistant.
- key:
- Discord Token:
- key:
DISCORD_TOKEN - value:
MTA3NXXX (this is from the step above)
- key:
Replit Set Environment Variable - OpenAI API Token:
Execute the Project
Click
Runon the topYou will see
Hello. I am alive!if you successfully run the project. Now Copy URL on the top right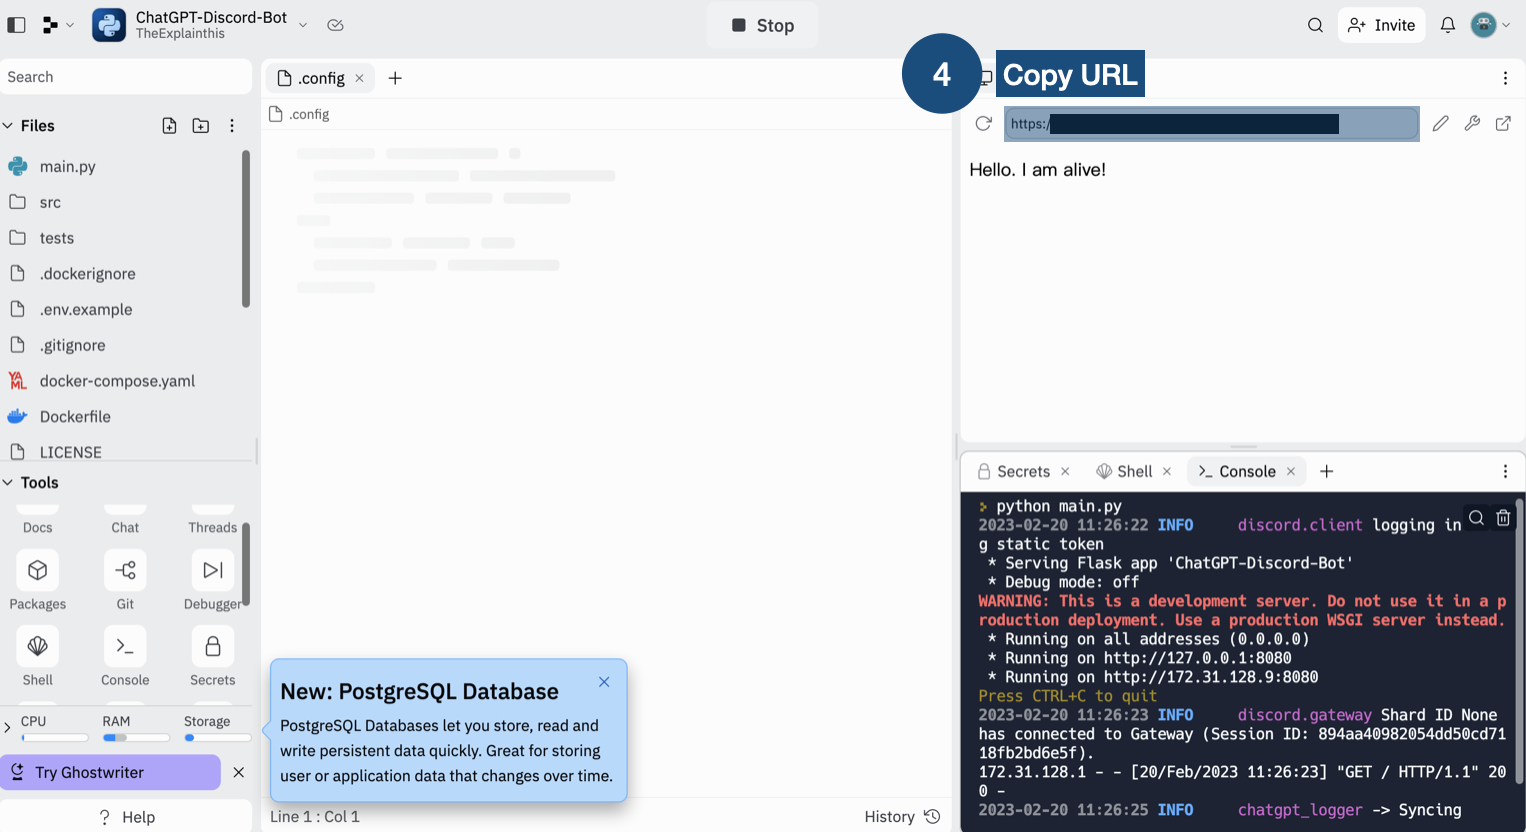
Replit Run ⚠️ If you do not make any request within an hour, the program will stop running. That's why we need the following steps
CronJob
Sign up or log in cron-job.org
Click
CREATE CRONJOBon the top right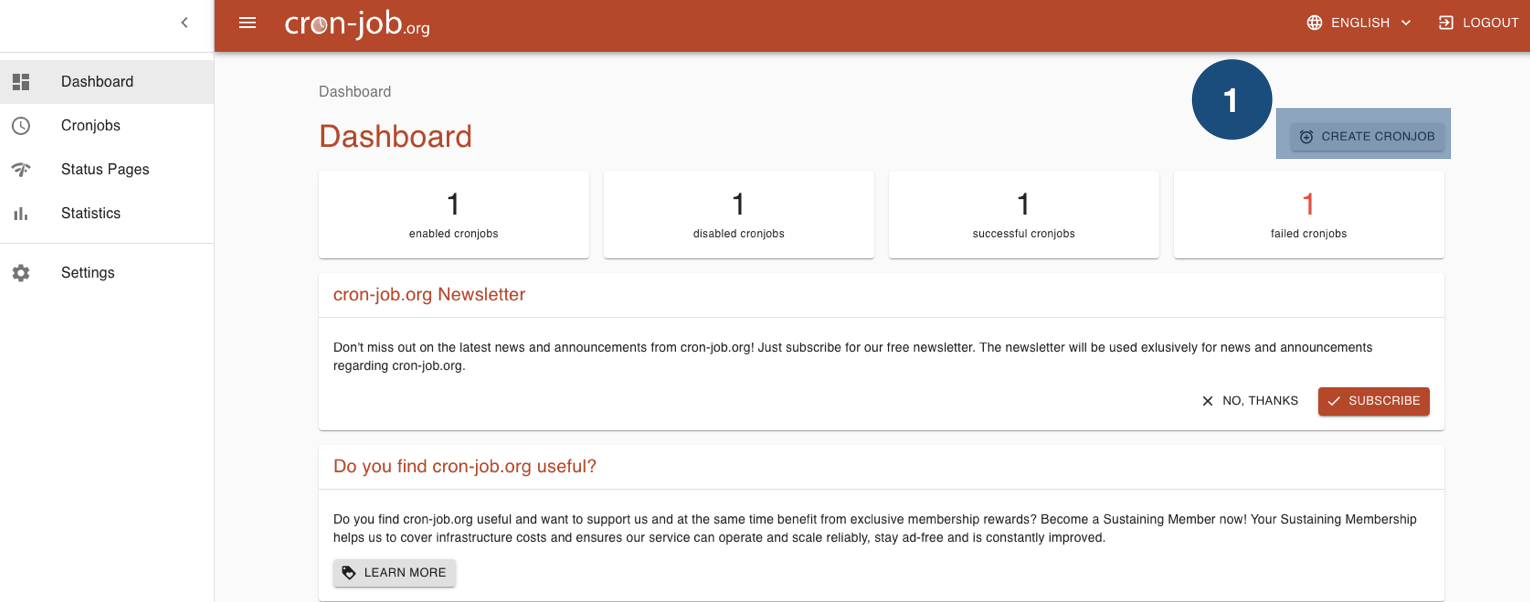
CronJob Step 1 Enter
ChatGPT-Discord-Botin theTitlefield using the URL copied from the last stepSelect
5 minutesso that it will call the api every 5 minutesClick
CREATE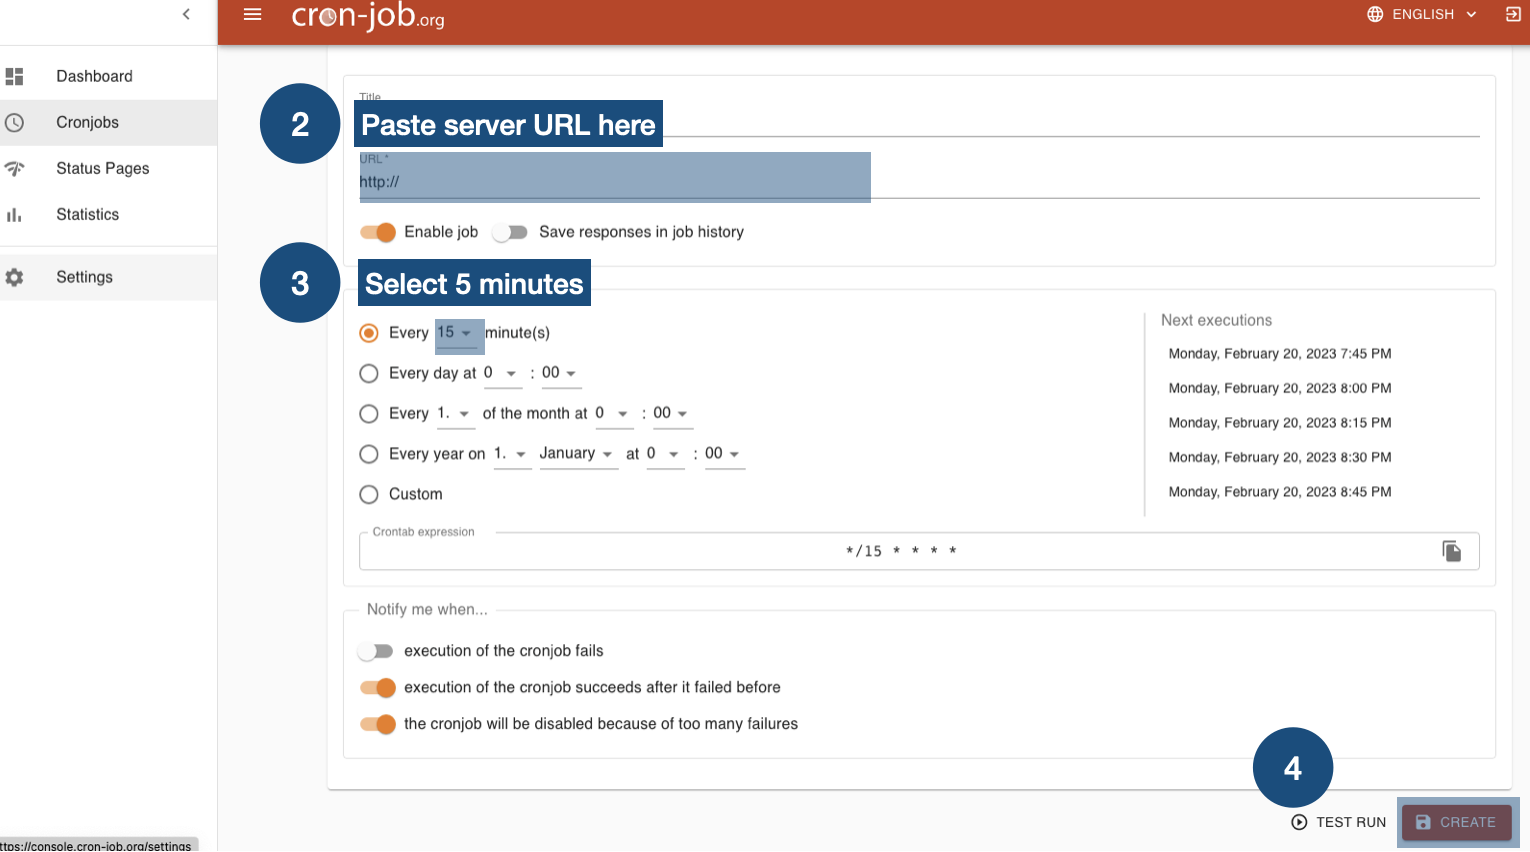
CronJob Step 2
Commands
| commands | what it does |
|---|---|
| /chat | Type /chat in the input box to and enter texts to interact with ChatGPT. |
| /reset | ChatGPT will remember the first 10 interactions. Resets ChatGPT's memory with this command |
| /imagine | Type /imagine in the input box, then enter the text to generate an image using the DALL·E 2 model. |
Q&A
How do I view log files? In the Replit project, there is a
logssection on the left. The logger in the project will record logs there, and you can add your own logger to it.How do I adjust the image size of DALL·E 2 output? Modify the
image_sizeparameter in/src/models/OpenAIModel.
Conclusion
This article has taught you how to integrate ChatGPT with a Discord bot to create a powerful collaboration assistant. By following the integration and setup steps, you can easily start using ChatGPT in your team's Discord channels!